In today’s digital age, it has become common to record computer screens for various purposes such as capturing gameplay, creating video courses, giving presentations, and showcasing other noteworthy activities. While Windows 10 offers a built-in Game Bar for capturing on-screen activities, some users express a need for more advanced video capturing tools than the Xbox provider. In such cases, a dedicated screen recorder for Windows 10 becomes necessary.
With so many screen recording tools available online, finding the right one can be a daunting task for beginners. Fortunately, we’ve tested the various software options on the market and compiled a list of recommended screen recorders. This selection includes both freeware and paid options. Check out their features according to your needs and preferences.
Free Windows 10 Screen Video Recorders:
Recording your screen on Windows 10 is a valuable skill, especially for video tutorials, as it streamlines the explanation process with visual aids. Additionally, screen recording allows you to capture specific moves in games and share them with friends. Moreover, a free video recorder is a must-have for preserving memorable moments, such as group FaceTime calls. It’s worth noting that some free video recording tools offer features comparable to their paid counterparts.
1. Windows 10 Game Bar
The Windows Game Bar, also known as the Xbox Game Bar, is a built-in screen recorder for Windows 10, provided for free. This application features customizable controls and a user-friendly gaming overlay design. Compatible with most PC games, the Xbox Game Bar allows users to access various widgets with just one click. It facilitates easy screen recording and sharing capabilities.
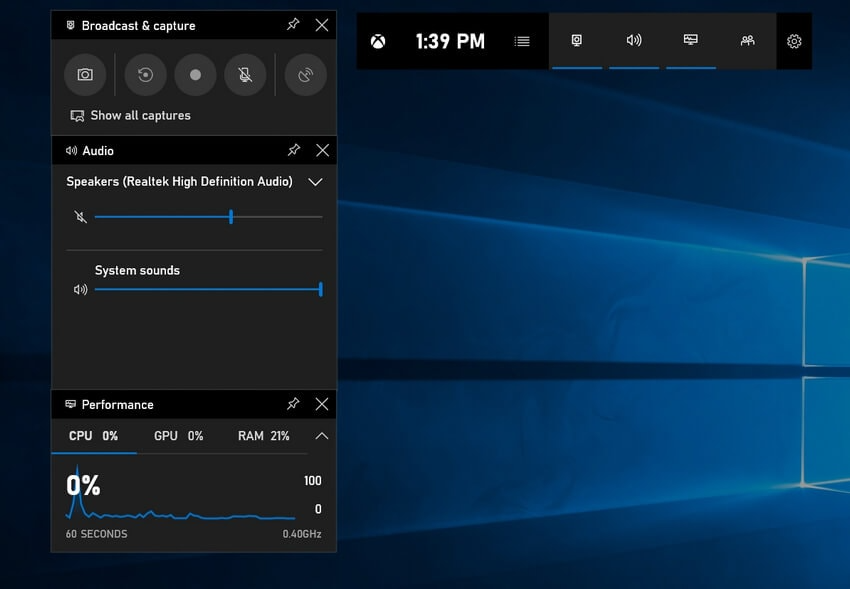
LFG (Group Search) features support the discovery of new teammates and enable chatting with friends on Xbox consoles or PCs without leaving the game. Additionally, the app offers a number of features to enhance the gaming experience, ensuring a seamless session without any interruptions. It includes an instant sharing feature across platforms and provides tools like clipping and voiceover, contributing to its popularity.
Activate the Windows 10 Game Bar
Using a reliable screen recording app becomes important when users expect high-end video quality and additional features from an application.
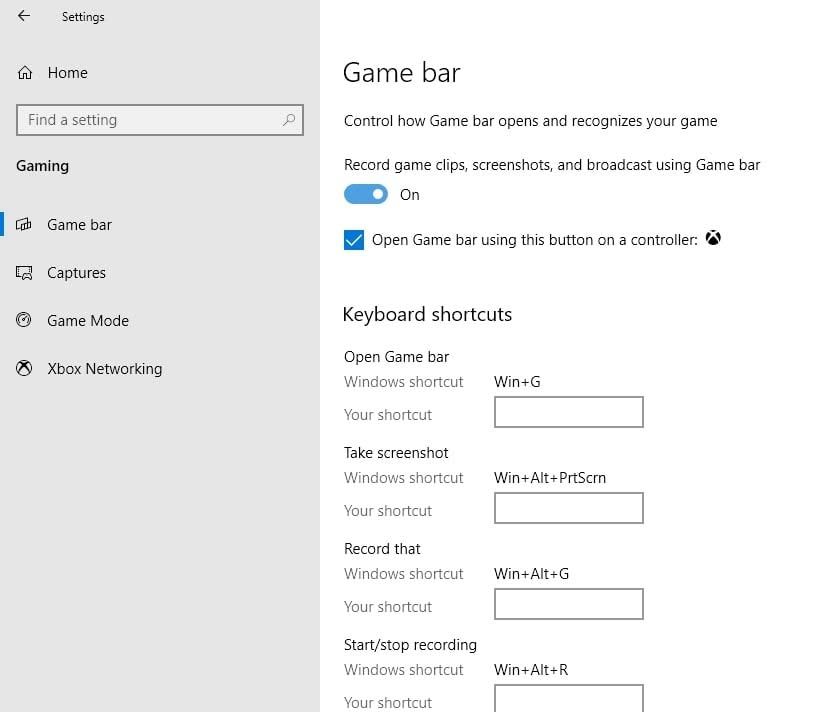
More than just capturing videos, Screen Recorder serves as a versatile tool for guiding others through specific tasks, recording meetings and lectures, and more. For Windows users, the Windows Game Bar proves to be an effective tool for these purposes. It is worth noting that users need to activate it before using its features. Below is a handy table of keyboard shortcuts to help users perform specific tasks easily:
Record Screen on Windows 10
To start recording using the Windows 10 Game Bar, the initial step involves activation. For Windows 10 users, the majority will need to get the Xbox Game Bar application from the App Store. To do this, go to the search bar, search for “Xbox Game Bar” and proceed with the installation.
After that, users can manually activate the Game Bar by accessing the Windows Apps section or by simply pressing the Windows + G keys to launch the Game Bar floating widget.
To start screen recording, users can use the Start or Stop button. Alternatively, they can press the Windows button along with Alt and R to start the screen recording process.
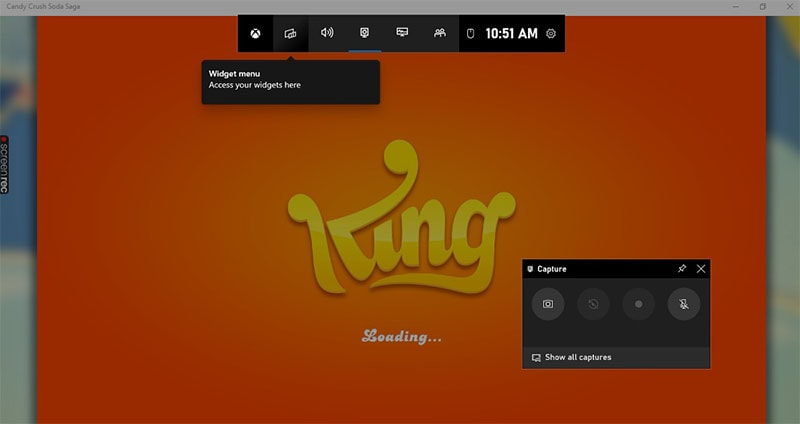
Various functions are available, including capturing screenshots, adding a microphone or camera to the recording, and broadcasting the recording as a live stream on social media platforms.
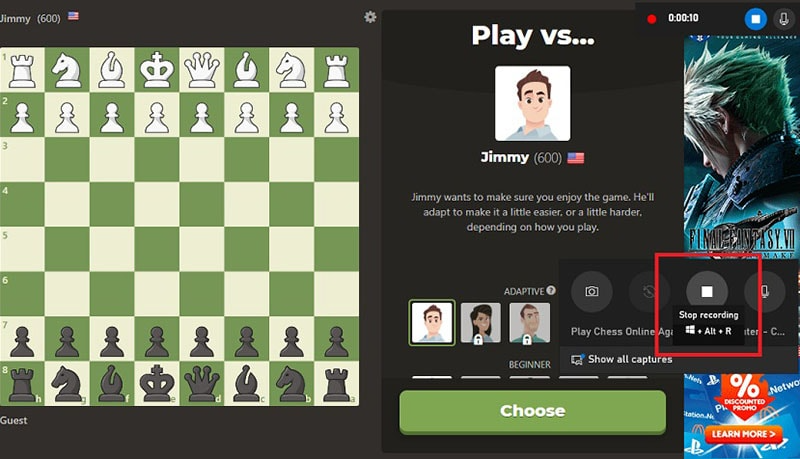
After the recording is finished, users have the ability to rename or delete it, trim the footage, and even add voiceovers, providing considerable flexibility for a variety of situations.
Recording in the background
The background screen recording feature of the Game Bar in Windows 10 is very effective for capturing every aspect of the screen. Users can expect satisfactory audio and video quality while using this screen recorder. What sets this application apart is not only the exceptional output quality but also its smooth operation in the background, which adds an extra highlight.
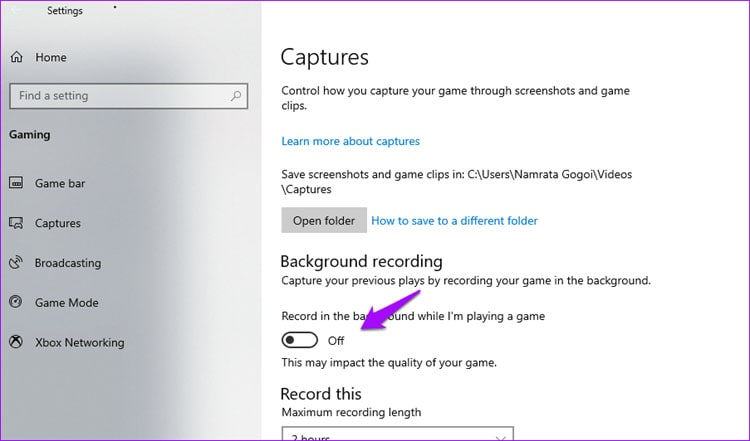
Within the Game Clips section, users have the flexibility to set both the duration and quality of their recordings. Once these parameters are set, a floating window is activated, facilitating continuous high-quality screen recording or streaming.
The Game Bar has been designed with user convenience in mind, allowing various tasks such as starting or pausing a broadcast and turning on/off the microphone or camera using various keyboard shortcuts. The combination of these features has contributed to its popularity among screen recording users.
2. Screen Record Pro for Windows 10
Screen Record Pro stands out as one of the best free screen recording solutions for Windows 10. Not only is it easy to install, but its intuitive design makes it suitable for a variety of screen recording needs. With this application, users can easily capture anything on their screen, be it a specific area, applications, or active windows on their PC.
Moreover, Screen Record Pro offers additional features such as webcam support, audio recording, and cursor tracking. If you want to download and install a reliable free screen recorder for Windows 10, follow the step-by-step guide below:
Download and install Screen Recorder Pro
To get and set up Screen Video Recorder on Windows 10, users should visit the Microsoft Store and search for “Screen Record Pro”.
On finding the application in the search results, users can proceed to download it by clicking on the designated button.
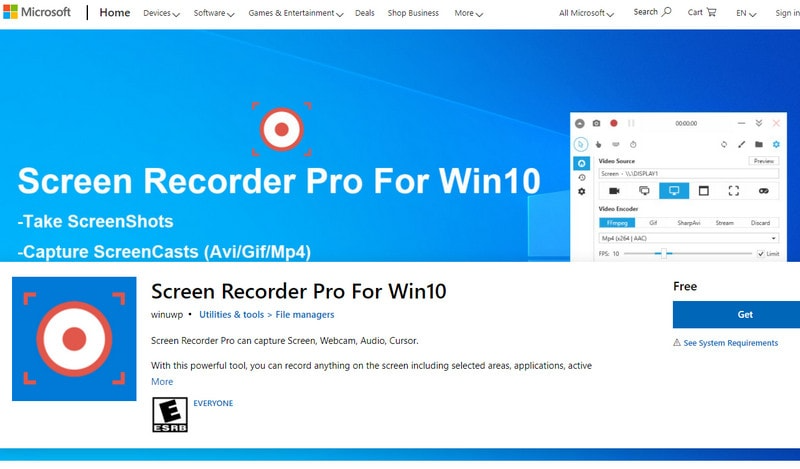
After the download is complete, the application will automatically install automatically. After the installation process is complete, users can find and open Screen Record Pro from the list of applications in the Windows menu.
Record video with Screen Recorder Pro
To start using Top Screen Recorder for Windows 10, just go to the designated page. Here, you’ll find a step-by-step guide to setting both video and audio quality to your preferences.
Users have the option to set time limits for their screen recording sessions directly within the interface.
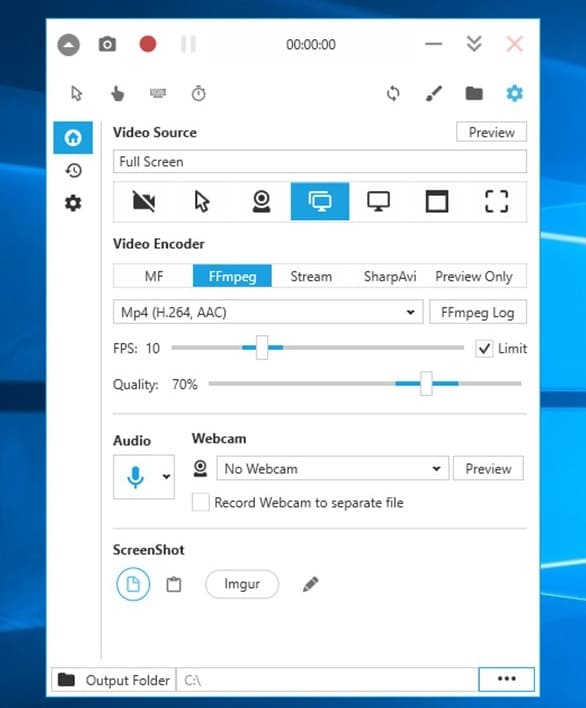
After adjusting these preferences, users will have access to a floating toolbar that includes buttons for actions such as starting or ending recording, as well as additional features.

After completing a recording, users have the option to rename, trim, or add a voiceover to their recording.

